Being a Girl Scout Leader means of course, taking the troop camping. Even though I've already taken my troop camping I still was required to take a few classes so I could be sure I was doing things "The Girl Scout Way."
So, last night I went to my class. It was basically to learn different ways to cook outdoors.
Since the first thing a cook should do is, wash her hands, they had an outdoor "sink" set up.
Just fill up a large water container with water, put a bar of soap in a clean old sock or nylon and use a pan to catch the water. After all, you don't want water running through out your camp area.
We all made our own watering can, like the one in the photo. All it really is is a coffee can with wholes punched in the bottom and attached to a coat hanger.
Keep this near you in a bucket of water while you have a camp fire going and should anything catch on fire you will be ready to put it out. Plus, when you are finished with your fire, just sprinkle the water over fire or hot coals and it quickly goes out.
Normally, when one builds a fire they would pile the wood to look like a tee pee. That will allow plenty of air to get to the fire and it will be build a nice high fire.
If you are building your fire to cook over, it's best to stack your wood in a square or "log cabin" style. This will allow the fire to burn more low and spread out. Therefore, making it easy to put a grill over the fire.
Once you do this, you can then use your fire like a stove. Just put your pots and pans on top of and cook away.
Keep your coffee pot full of hot water so you can enjoy coffee, hot chocolate or tea through out the day.
Or just use it to heat up your water to wash your dishes later.
A tip to keep your pots and pan nicer is to rub dish washing soap on the outside before you place them over the fire.
By doing so, it will be easy to wash off the soot that builds up on them from the fire.
Bring charcoal with you when you go camping. If you do, you will open yourself up to a whole new way to cook outdoors.
Just heat your coals up. Use one of these charcoal chimneys to get them ready much faster.
While your coals are getting hot, line a dutch oven with foil (to make clean up a breeze).
Mix up your ingredients for whatever you want to make. We made Apple Crisp.
Then set your filled dutch over over some hot coals and place some more hot coals on top.
There are charts you can find either in your booklet that came with your dutch oven or on line that will tell you how many coals to use on the top and how many on the bottom. It will depend on how hot you wish to cook your dish as to how many you should use.
The one way of cooking that excited me the most was using a box to make an oven.
Just get a cardboard box and line it with a few layers of foil. Tape the foil to the outside to keep it attached. That's it! You now have an oven to bake whatever you want.
Place a cookie sheet or even a pie tin down first. You don't really have to do this but it will help to keep your oven clean and you can use it over and over again for many trips.
Put your hot coals down on the pan (or directly on the foil if you like). Use one coal for every 40 degrees you want to bake your item at. This means, if you are baking at 400 degrees then use 10 coals.
Then put four empty cans down. Place a rack (can use a baking cooling rack) on top of the cans. Place your cake, pie, bread or whatever you are baking down on the rack.
We made corn muffins. So we put our cupcake pan down directly on top of the cans. We didn't need to use the rack as it fit just fine without one.
Put the top of your box on. Be sure you lined it with foil also.
Then bake your item for as long as the recipe says.
It most likely will take the longer time to cook. Our muffin mix said to cook 15 to 20 mins. We had to cook it longer as it was not completely cooked at 15 mins.
Sometimes you may wish to cook hot dogs on a stick or roast marshmallows. Just make a regular fire and cook away.
In order to build your fire and keep it going you may wish to use a fire starter. Sure you can buy them at the stores. But why? You can make your own for free.
Just use an empty egg carton. Make sure it's the paper kind and not the Styrofoam ones.
Fill the cups up with lint from your dryer. Finally a use for all that lint!!!
Melt some old candles, crayons or even purchase some new wax if you like. Be careful though because it will be very hot!
Then pour the melted wax over the lint. Fill up each cup with the wax and let dry.
Break or cut the cups apart and light these on fire. They will burn great and get your fire off to a great start.
Easy and free. Now who doesn't like that?
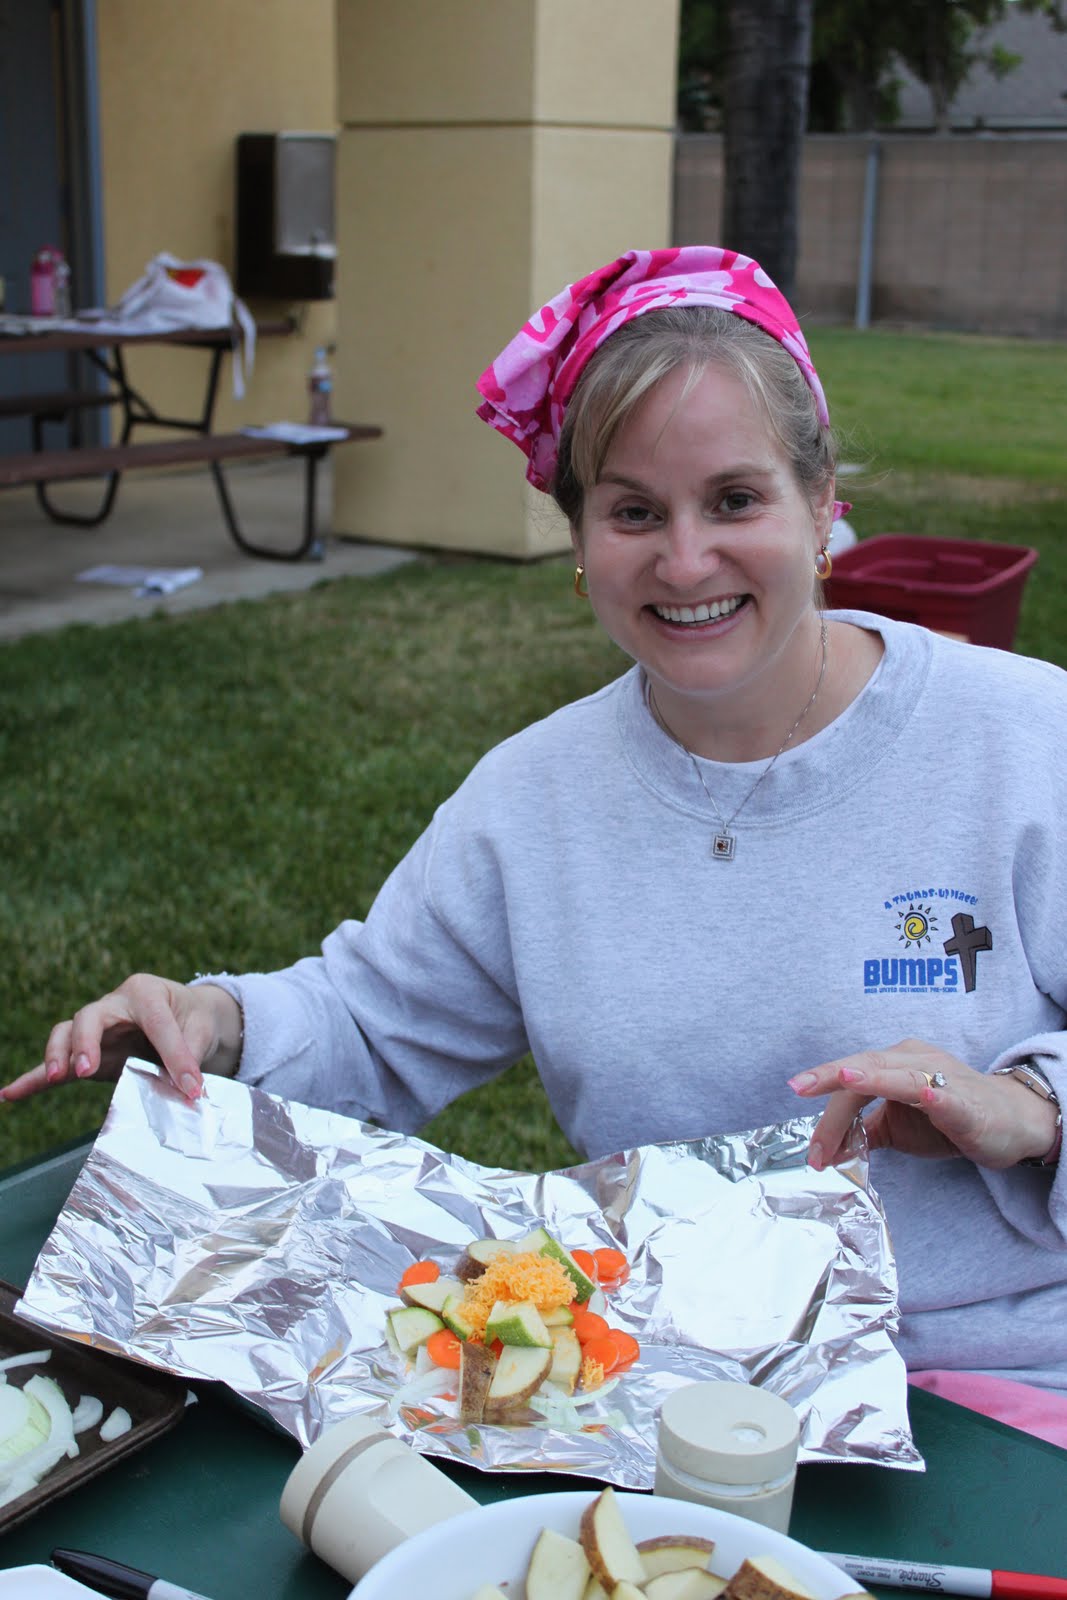
Another quick and easy way to cook a meal is to cut up your veggies and/or meat. Let everyone pick out what they enjoy and put it on top of a piece of foil.
Add a little butter to keep things from sticking. Season it with whatever spices you like. You can even top it with cheese.
Wrap up your meal in your foil. Be sure everyone writes their name on their own packet so they know who gets which packet.
Be sure your foil is sealed so you don't lose all the yummy juices inside. Then place your foil packet on top of the hot coals and let it cook.
Once everything is cooked through, pull off the heat, unwrap and enjoy.
This works great on a BBQ as well.
You can cook your marshmallows over a wood burning fire or over hot coals. I actually prefer to use the hot coals. I don't like mine burnt like some people do.
Using the coals allows them cook slower. Then will lightly brown outside but still be all melted inside.
Either way you like your marshmallows, they are yummy on their own. However, get a graham cracker, some chocolate and place your cooked marshmallow on top then add another graham cracker and you have a wonderful S'More.
What a great way to end your meal.
I hope you had fun seeing all the different ways you can cook outside. Now you can eat anything you like while camping. You are not limited to just a big fire any more.


.jpg)


