Tuesday, December 4, 2012
GIVE A TOY AND GET INTO KNOTTS BERRY FARM FOR FREE
Every year one of the things I love to do at Christmas time is to go to to Knott's Berry Farm. Or I should say Knott's Merry Farm.
These photos are all from when we went last year but we are going to go again this year too.
If you go before Dec. 16th this year you can purchase a toy at the gift shop there and then donate it to Toys for Tots and get in free.
The value of the toy has to be $25 or more. SO that means you get to help make a child's Christmas a great one and you get to have too.
They decorate for Christmas and even have a lot of booths set up with craft items and Christmas stuff that normally they don't have during the rest of the year.
Once inside the park you will find all sorts of fun Christmas activities going on. They have Christmas plays at the Bird Cage theatre, singing throughout the park, even a wonderful show SNOOPY ON ICE.
Even the Saloon has a fun Christmas show going on. I have to admit that Christmas time at Knott's gives me that old fashion Christmas feeling.
Of course all the rides are open too. But, I don't normally go on the rides during my Christmas visit there. I have get to much enjoyment seeing all the holiday cheer. I save the rides for other times.
I like to shop there though. They have one area set up where you can take the kids to see Santa and get photos taken.
It's my favorite place to spend a little extra time and watch the kids. Sure it's crowded but not like the malls.
If you are looking for a fun way to enjoy a little bit of country Christmas charm then make sure to add Knott's Merry Farm to your list of fun outings this season.
No, I don't get paid anything for posting this. I just wanted to share the fun with others.
Monday, December 3, 2012
FREE REINDEER LEGO SET
Do you have a child 6-14 years old that loves Lego's? If you do, then did you know that on the first Tues. of every month LEGO stores invites them to come and learn to build a new model for FREE!
This month on Dec 6, 2012 kids can go learn to build a reindeer and they get to keep LEGO set for FREE! No purchase necessary.
My only advice is to get there early because it starts at 5:00pm and lasts until they are gone. I'm sure this is going to be a popular event.
These sets can not be purchased and they in limited quantities.
Labels:
Free Christmas fun,
Free LEGOs,
LEGO Reindeer
FREE AND ALMOST FREE CHRISTMAS FUN IN ORANGE COUNTY CA
I LOVE LOVE LOVE Christmas time! I love to go see all the beautiful lights, listen to the Christmas carols, watch Christmas plays and movies, enjoy the sights and smells that can only be found when Christmas is in the air.
I try to find as many fun Christmas things to do during December. This year is no different.
It's only the 2nd and so far I've already done several Christmas things.
I took my Girl Scout troop last night to San Juan Capistrano where they had the whole Downtown area joining in the Christmas cheer.
There was lots to see and do. There were hay rides, Christmas train rides, Mission San Juan Capistrano was full of activities such as crafts, Santa, men and women dressed up in Dickens's style clothes wondering around singing carols, shops were having great sales too.
There was free photos with Santa and free candy canes.
There was a Christmas play, groups singing, a living Nativity, food and drinks.
There were big crowds yet everyone was friendly and nice. It seemed like many came out for one event that their families waited for every year.
The yearly lighting of the Christmas tree! This isn't the best picture. In fact, it's not even the whole tree, really it's just about 1/3 of the tree as I was standing back pretty far.
If you missed this outing this year, be sure to mark your calender for next year. It's fun and most of the things going on are free.
From there we went over to what is known as The Christmas House tour. It's a beautiful large house that is located at 25473 Nellie Gail Rd, Laguna Hills, CA.
They go ALL out for Christmas here. The outside has thousands of lights that are set to music. Outside they offer warm cider to sip on while you watch the show.
They also invite everyone in to tour their home that is decorated from floor to ceiling.
I love the big larger then life Toy Soldiers that guard the front door.
But, not nearly as much as I do the large snowman and reindeer that greet you before you enter what can only be described as a Christmas Wonderland.
The owner has collected many treasures and has them all on display. She has several different Christmas villages all set up. She carves Styrofoam to make the backdrops. It's so pretty all lite up. I could spend hours looking at everything.
There are several trees, garland by the miles and lights aglow.
Every inch of the home was decorated. I loved her kitchen and how it was done with gingerbread and Holiday chefs.
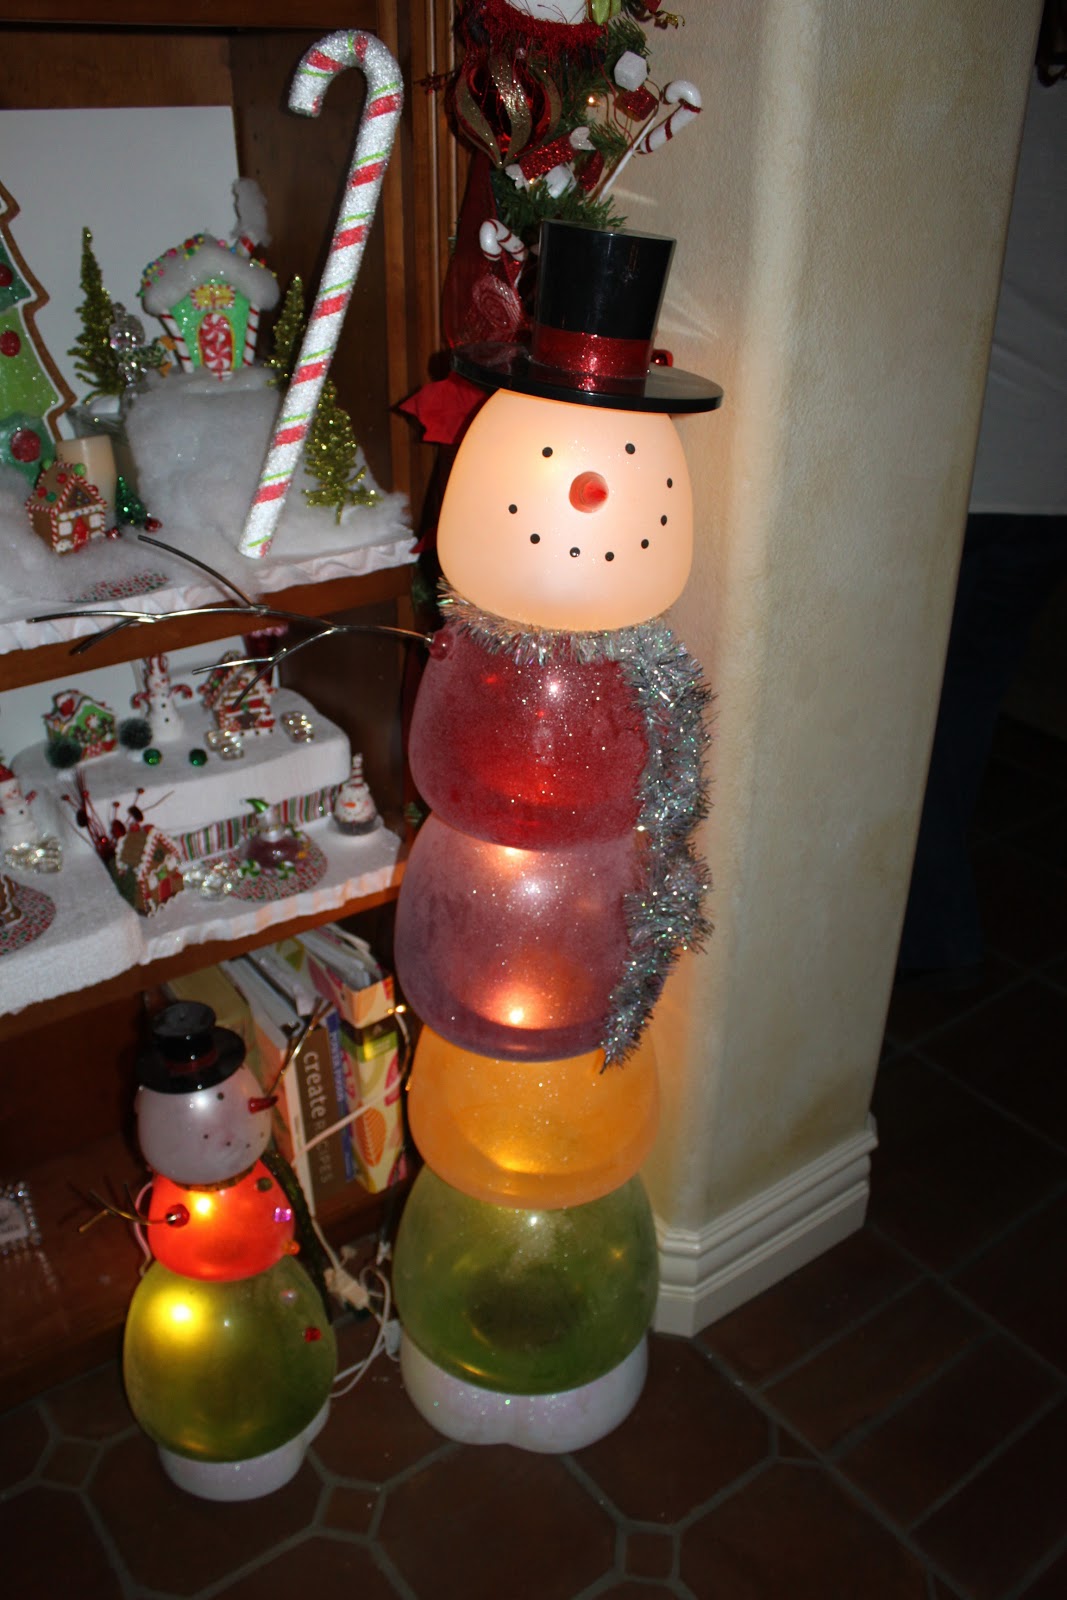
These light up gum drop snowmen were so darling.
I love how she covered her pictures with Santa Suits.
You must look up too because if you don't, you may miss some pretty decorations too.
They do this every year and people come from all over to step into what seems like a fantasy. If you live near by you MUST go.
They open their doors every night and you won't be sorry you went. It's a great place to take the family for a bit of Christmas fun and best of all...it's FREE!
Saturday, October 27, 2012
WITCHES PARTY ON A BUDGET
I know I've been gone for awhile but I've been super busy lately and just have not really had time to post much.
I got several request to start posting again and I promise to try to be better and post more often.
I'll start with a fun little Witch Party I had for my girl scout troop tonight. I wanted to do this party on a pretty tight budget.
I had a lot of fun making decorations for this party. I searched on line and found this cool "book of Spells". I can't remember where I found it but if you know, please tell me so I can give them credit.
It was super easy to make. It's just a book cover really. So inside is a book I had hanging around the house. Next year, I want to make a more detailed book. I'll have to start much earlier though. However, once it's done, it will be able to be opened and look more real.
I also made a bunch of "potions". Again, I searched on line and found several different types. I used a bunch of old bottles I got for free from Craigslist. Got to love free!
Then I printed off different labels and had fun filling them up with different things.
Toad Bladders was actually some dried cherries I had made with my dehydrator. Mermaid Hair was easy, I just cleaned out my brush and used that hair. Green Grubs, well that was dried cilantro.
My favorite was the Snake Oil. I used real oil and then rubber snakes. It really is a creepy effect!
You can go crazy finding things to use. I loved searching for different things that would be great for the color, the thickness of the liquid or some other fun reason.
I also found a picture on line to print off and I put it in a frame. It became instant family ancestors.
Legend has it that, the green frog was the witches old boyfriend that upset her and so she turned into a frog for all eternity.
The tablescape was very cheap this year. I borrowed the big witch for the centerpiece from my good friend.
The beware sign was from Target for $2.00. I had the cauldron, tablecloth and spiderweb three tier plate on the left. So those were all free to use again.
The same friend that let me borrow the witch gave me the plates and napkins, as she bought a lot and had extra.
I had the little black cauldrons that I had purchased two years ago and didn't use. I filled them with flavored Tootsie rolls and put the green ones on top so it looked like witches brew.
I covered large candy bars with some fun scrap booking paper, a little ribbon and black flower and added a few orange stones.
The paper was only 59 cents and the flowers and stones came from my same good friend that loaned me the witch. I had the ribbon. Cheap and much nicer then just putting a candy bar on the table.
My favorite thing was these witches. I found them at the Dollar Tree. Then I just printed out the names of the girls and used them as place card holders.
These little spider web napkin rings were already in my Halloween supplies. I had purchased them at Kohl's on clearance a few years back.
I found the witch finger suckers at Knott's Berry Farm. I couldn't pass them up.
Rather then use plastic glasses, I thought the girls would enjoy having real glass to drink out of. So when I came across these green glasses, I knew that with a little black glitter spider sticker they would be great to use for this party.
Again, found at Dollar Tree.
I know you can't see the coaster but it's of a witch. I don't remember where I found them but I had purchased them last year. I think they came from Target and were in the clearance section after Halloween last year.
Oh the skulls in the background also came from Dollar Tree.
I love these fans. The color and black cat theme went perfectly with my theme so I got five and hung them up as a back drop to the party. Yes, they also came from Dollar Tree.
So see, it really doesn't take much money to decorate and have fun on Halloween.
Even the little witch shoe candle holders came from the Dollar Tree.
Oh, I almost forgot they each had a witches broom that was pen at their place setting and a fun orange and white paper straw.
The broom came from a candy store in Laguna Niguel and the straws were ordered on line.
At the end of the party, the girls all got to take home everything at their place setting. That way, they get to remember the party every year as they put out the decorations.
I don't like to use the same decorations over so it also keeps me from having to pack this stuff away.
I didn't get a good picture of the aprons but they were cute. They were witch bodies.
We made pumpkin bread so they were great to keep the "witches" clean.
I hope you enjoyed seeing our little party as much as I enjoyed putting it together.
Happy Halloween!
I got several request to start posting again and I promise to try to be better and post more often.
I'll start with a fun little Witch Party I had for my girl scout troop tonight. I wanted to do this party on a pretty tight budget.
I had a lot of fun making decorations for this party. I searched on line and found this cool "book of Spells". I can't remember where I found it but if you know, please tell me so I can give them credit.
It was super easy to make. It's just a book cover really. So inside is a book I had hanging around the house. Next year, I want to make a more detailed book. I'll have to start much earlier though. However, once it's done, it will be able to be opened and look more real.
I also made a bunch of "potions". Again, I searched on line and found several different types. I used a bunch of old bottles I got for free from Craigslist. Got to love free!
Then I printed off different labels and had fun filling them up with different things.
Toad Bladders was actually some dried cherries I had made with my dehydrator. Mermaid Hair was easy, I just cleaned out my brush and used that hair. Green Grubs, well that was dried cilantro.
My favorite was the Snake Oil. I used real oil and then rubber snakes. It really is a creepy effect!
You can go crazy finding things to use. I loved searching for different things that would be great for the color, the thickness of the liquid or some other fun reason.
I also found a picture on line to print off and I put it in a frame. It became instant family ancestors.
Legend has it that, the green frog was the witches old boyfriend that upset her and so she turned into a frog for all eternity.
The tablescape was very cheap this year. I borrowed the big witch for the centerpiece from my good friend.
The beware sign was from Target for $2.00. I had the cauldron, tablecloth and spiderweb three tier plate on the left. So those were all free to use again.
The same friend that let me borrow the witch gave me the plates and napkins, as she bought a lot and had extra.
I had the little black cauldrons that I had purchased two years ago and didn't use. I filled them with flavored Tootsie rolls and put the green ones on top so it looked like witches brew.
I covered large candy bars with some fun scrap booking paper, a little ribbon and black flower and added a few orange stones.
The paper was only 59 cents and the flowers and stones came from my same good friend that loaned me the witch. I had the ribbon. Cheap and much nicer then just putting a candy bar on the table.
My favorite thing was these witches. I found them at the Dollar Tree. Then I just printed out the names of the girls and used them as place card holders.
These little spider web napkin rings were already in my Halloween supplies. I had purchased them at Kohl's on clearance a few years back.
I found the witch finger suckers at Knott's Berry Farm. I couldn't pass them up.
Rather then use plastic glasses, I thought the girls would enjoy having real glass to drink out of. So when I came across these green glasses, I knew that with a little black glitter spider sticker they would be great to use for this party.
Again, found at Dollar Tree.
I know you can't see the coaster but it's of a witch. I don't remember where I found them but I had purchased them last year. I think they came from Target and were in the clearance section after Halloween last year.
Oh the skulls in the background also came from Dollar Tree.
I love these fans. The color and black cat theme went perfectly with my theme so I got five and hung them up as a back drop to the party. Yes, they also came from Dollar Tree.
So see, it really doesn't take much money to decorate and have fun on Halloween.
Even the little witch shoe candle holders came from the Dollar Tree.
Oh, I almost forgot they each had a witches broom that was pen at their place setting and a fun orange and white paper straw.
The broom came from a candy store in Laguna Niguel and the straws were ordered on line.
At the end of the party, the girls all got to take home everything at their place setting. That way, they get to remember the party every year as they put out the decorations.
I don't like to use the same decorations over so it also keeps me from having to pack this stuff away.
I didn't get a good picture of the aprons but they were cute. They were witch bodies.
We made pumpkin bread so they were great to keep the "witches" clean.
I hope you enjoyed seeing our little party as much as I enjoyed putting it together.
Happy Halloween!
Sunday, September 9, 2012
ROASTING YOUR OWN SALTED SUNFLOWER SEEDS
I love sunflower seeds. But only if they are salted. So the thought of roasting my own never sounded that great to me.
Until I learned the correct way to do it.
I was so excited when my sister, Maureen, came over and announced she had a gift for me. She handed me a bag and inside I found this!
I was so happy. Some of you may be saying "what in the world is that!"
It's a dried sunflower. You see, Maureen grows sunflowers almost every year in her garden and this year she was kind enough to dry one and give it to me.
This is what it looks like close up. Can you see the tops of all the sunflower seeds in there? A lot of the time, birds get to these and you miss out.
It's very easy to get the seeds off. Just run your fingers along the seeds and they will fall out. Start at the outside though or it won't work to well.
See, they fall right out. They will be some what softer then the ones you may be used to. Remember they are not roasted yet.
You can get a better view of the seeds now.
You won't be able to get all the seeds out because towards the center they are not fully developed yet. I stop getting them when they start to come out pretty thin. You can tell the seed inside the shell is not developed yet.
Since I was making salted roasted seeds I used Kosher salt. It melts easier. If you don't want your seeds salted you don't need to add this.
I put 1/2 cup of salt in a bowl and filled it up with water. Next time, I will either use more salt or not as much water. I like my seeds pretty salty.
Stir the salt until it dissolves and add your seeds that you have rinsed and cleaned.
The seeds float to the top so I put a bit of waxed paper down on top of them and then a plate to hold them under the water.
Let them sit for at least 8 hours. You can leave them in there longer if you like but it will take at least 8 hours for them to start soaking up the salt water all the way through.
I left mine in for about 20 hours. I stirred them around a few times to make sure they all got in the water good.
When they are finished soaking, do not rinse them off! Just drain them and pat dry with a paper towel a little bit. Then put them on a cookie sheet in a single layer.
At this point, I sprinkled a little bit more salt on them. Yes, I love salt!
Roast them at 300 degrees for 30 mins. Move them around 1/2 way through. You don't want them to burn. Check to see if they are done. I put mine back for 10 more minutes as the inside seeds were still a little soft.
Once they are done, they will be nice and dry and crispy. Just like the ones you buy at the store. Only these will have much more flavor!
I put these in a cello bag and tied a ribbon on it and put a little sunflower on it. I'm giving these to Trinity. Maybe next year, she will want to plant lots of flowers so we can make tons more.
Subscribe to:
Posts (Atom)