Showing posts with label Making Jam. Show all posts

Wednesday, September 8, 2010

I FOUND MY THRILL ON BLUEBERRY HILL


I love blueberries. I can't get enough of them these days. I love them baked in things, added to cereal, ice cream or even just by the handful.

I was starting to get a little sad about thinking about them going away for the year. So, to keep that fresh blueberry taste even in the winter, I made jam.


I started by washing all the blueberries.


Be sure to pick out the bad ones and take the stems off the ones got missed before sent to the store. After all, no one wants stems in their jam.


Then I smashed them. It was kind of fun doing this step. I just used a potato masher. It was quick and easy but I guess you could put them in a food processor if you like. Just pulse them quickly.


Mashing them brings out all the flavor. Don't go over board though. You want to still see some of the whole berries. At least I did.

My best tip for making jam or canning anything is to do all your prep work first. You don't want to have to stop once you get going.


So, I got my fresh squeezed lemon juice measured out ahead of time. Two tablespoons is all I needed. That was 1/2 of a fresh lemon.


Then I measured out my mashed berries. I needed 4 1/2 cups. I put the measured amount in a separate bowl so I could just dump them in when ready.


I did the same with the sugar. For one batch of blueberry jam you need 7 cups of sugar. Yes, that's right 7 cups. Homemade jam uses a lot of sugar.


The recipe I used called for two pouches of pectin. I use liquid Certo. I've never tried any other brand or the dry pectin so, I have no idea how much of those you would need.


I got my seals simmering. This softens up the rubber seal so it form fits the jars. I also put the jars in my dishwasher to sterilize them.


Then I got my canning pot out and brought the water to a boil. This takes awhile as the pot is big.

I was thrilled when I found this pot and rack inside at a thrift store. I don't think it was ever used before. It sure makes canning a lot easier.

If you don't have one of these you can use a large pot and put a rack on the bottom or even a towel. You just don't want your jars to sit right on the pot as they may crack. The pot has to be big enough to cover the jars with at least an inch or two of water.


After I got everything ready it was time to make the jam. I poured the blueberries, sugar, lemon juice and a teaspoon of butter into a large pot. The butter helps keep the jam from foaming up to much.

Be sure to keep stirring as you don't want the sugar to burn on the bottom of the pan.


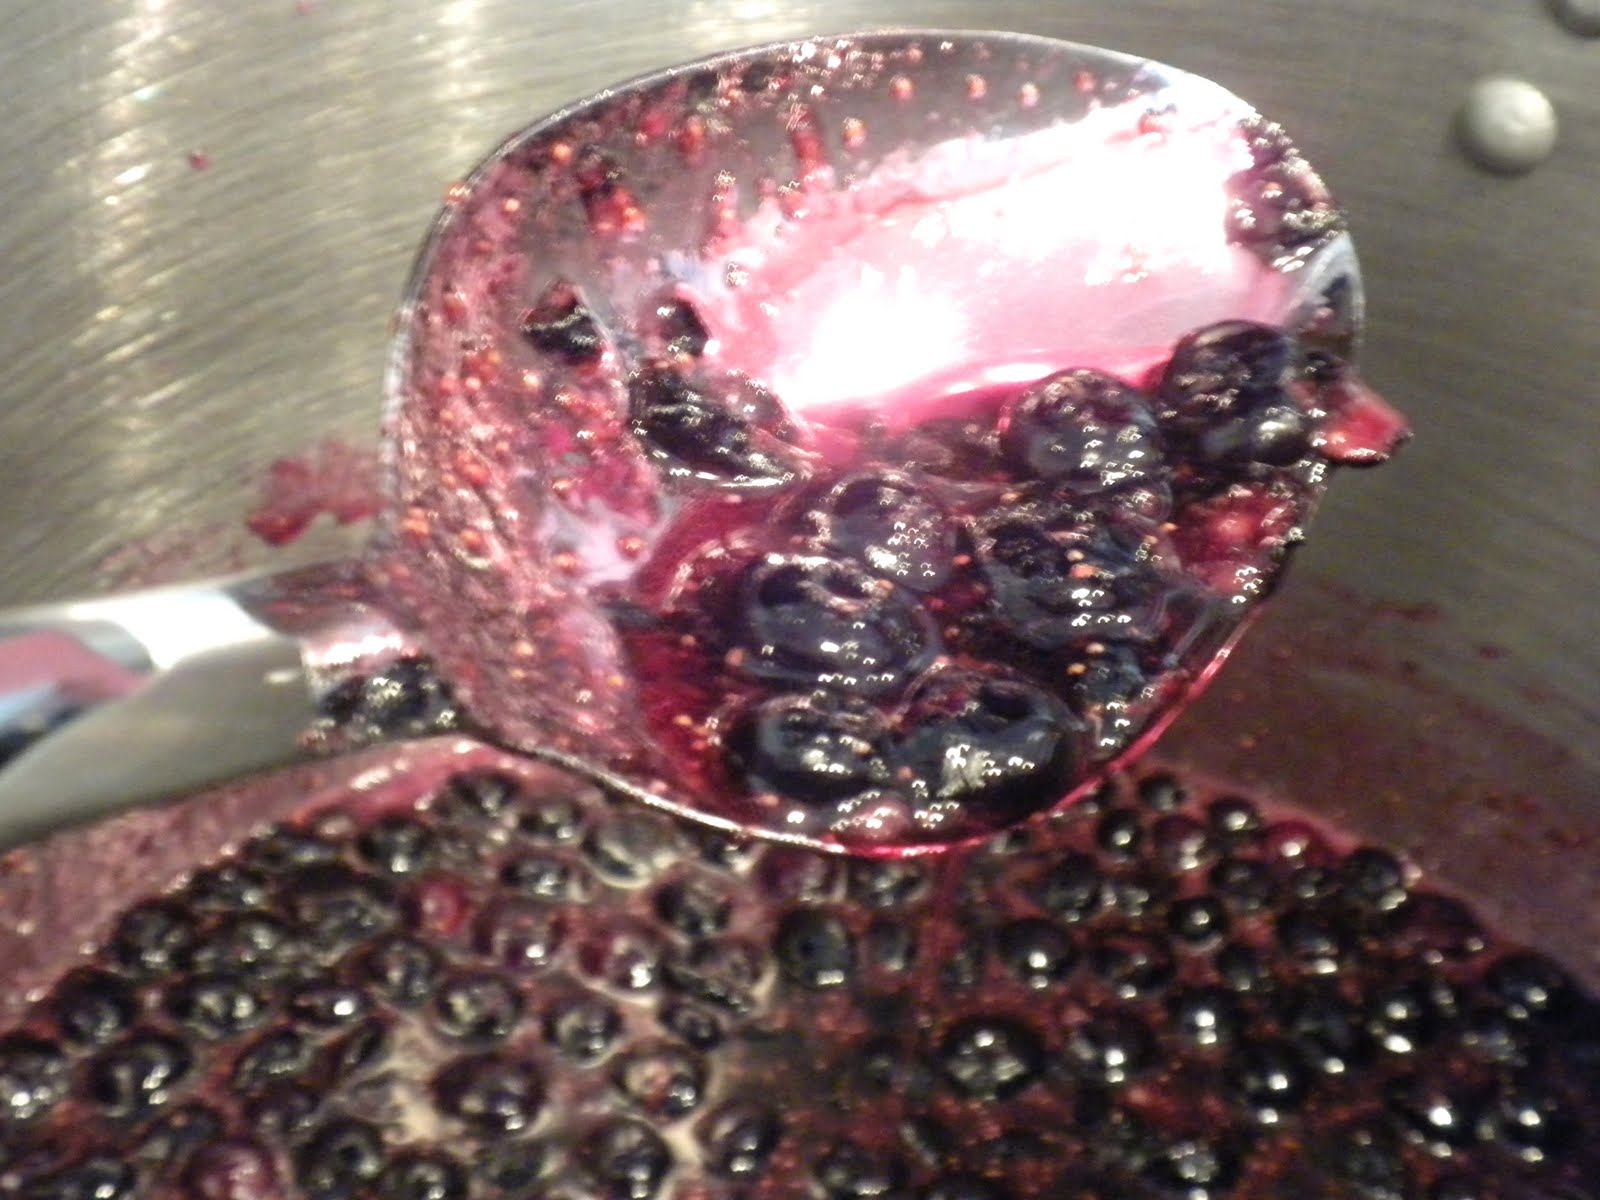
The blueberries make such a pretty color. Here you can see the pretty color and also that even though I mashed the berries, you can still see that you can tell it's blueberries in there.


Bring the mixture to a full rolling boil. Then add the Certo, bring it back to a full boil for only one minute. Don't over or under cook it.

As soon as the minute is up, turn off the heat and remove the pot from the stove.


Poor the hot mixture into your clean, hot jars. If you use a funnel it makes it so much easier. You can just put the jam directly into the jar but it's really hot and if you are holding the jar you could really get burned.

My tip on using a funnel is to not just dump the jam into the funnel. This will cause the jam to plop down into the jar and it will splash up, getting on you and everything else. Yes, I know this from first hand experience.

Poor the jam onto the side of the funnel and let it run down the side into the jar. You will be much safer this way.

Use a wet cloth and wipe the rim of the jar. You don't want anything on there because if there is then the seal will not work. If this should happen, it's OK. You can still eat your jam. You will just have to put it in the refrigerator and eat it within a few weeks.

If you put it on the shelf it will spoil as the vacuum seal will not be there.


Put the jars with the lids on them into the canner and lower the rack into the boiling water. Cover the pot with the lid and boil for 10 minutes.


Don't forget to make sure the water covers your jars at least an inch or two once the rack is lowered.

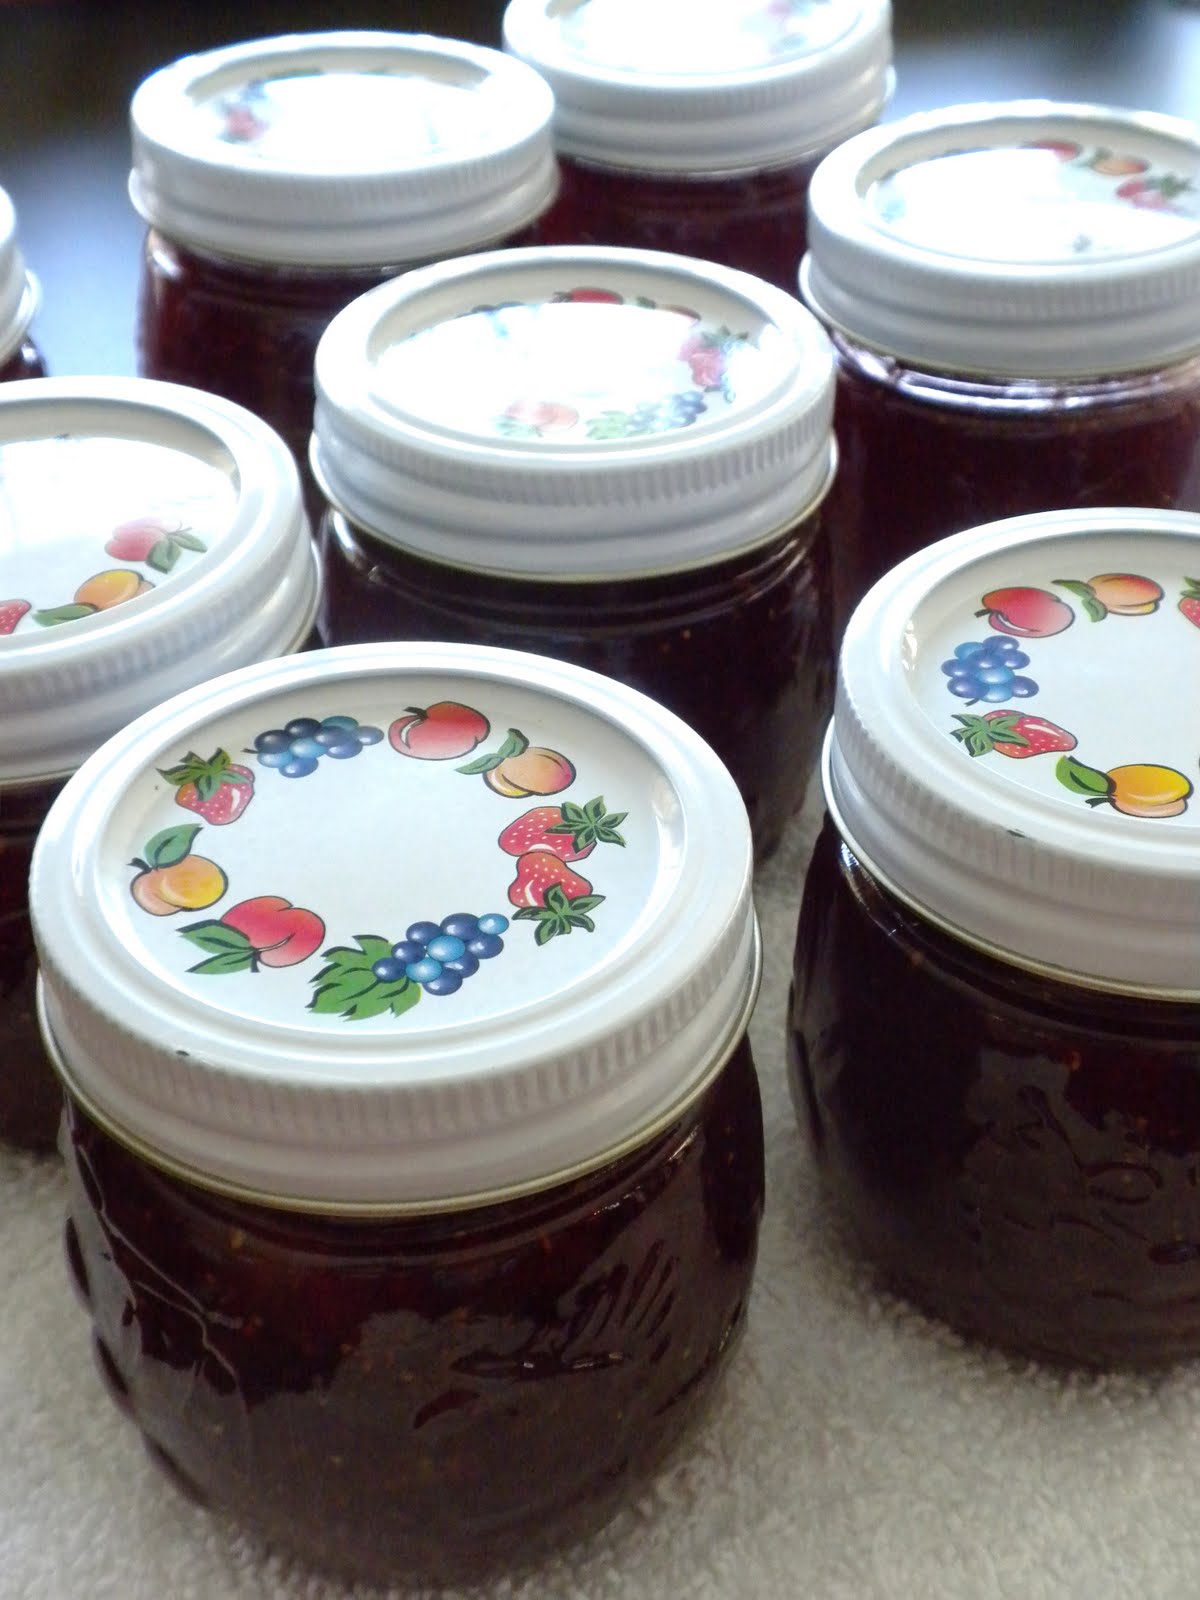
Once the time is up, lift up the rack and remove the jars. You will soon hear that pop, pop, pop sound that comes when the jars form the vacuum and the lids are sealed tightly.


Place the jars in a place they won't get disturbed for 24 hours. That's it! You now have jam. How easy was that!

I will put some cute labels on these and I plan on giving them out for Christmas gifts this year.

There is nothing as good as yummy homemade jam.

Here is my last tip, if you take some jam out and heat it up so it becomes warm and runny you can pour this on ice cream for the best dessert you have had in a long time.

Enjoy!

Photobucket


Wednesday, June 23, 2010

HOW TO MAKE STRAWBERRY JAM


I just got finished making four batches of fresh strawberry jam! I can hear the popping sound of the jars sealing themselves as I type this.

A friend of mine showed me years ago how to make jam and I've made it almost every year since. It's easy, tastes so much better then store bought and it's fun to do.

So, as I was making the jam, I took some photos to show you how easy it is and maybe you too could make jam for you and your friends and family.


You start off with some great fresh, ripe strawberries. For four batches, I had a crate, which is 12 baskets.

I got these at the strawberry stand by my house. You can't get fresher then these. They grow them right there, pick them and carry them up to the stand.


Be sure to wash your berries. You don't want any dirt, bugs or unwanted items.
Then you need to take off the stem and cut them up into smaller bits.


I like quick and easy so I use the food processor. It makes it go so much faster.


Don't over do it though. You don't want to turn your fruit into juice. You still wants to be able to see the bits of strawberries.

It's hard to tell in this photo but you can still see the bits of strawberries. I don't like big pieces of strawberry in my jam. If you do, then make your pieces bigger.


The most important thing to do is prepare everything before you start.

Get your berries washed and measured out (four cups), measure your sugar (7 cups) and your pectin. I use liquid so I used one pouch.

You will also need to get your jars cleaned and sterilized. I have a setting on my dishwasher to do this but if you don't, then you will need to boil your jars.


Put your lids (the flat part, not the ring) into hot water and bring to a boil. You can then lower the heat down to a simmer.

This will sterilize them and soften up the rubber part so they can seal your jam jars when you are ready.


There are several different kinds of pectin. Like I said, I use the liquid one. There is also dry pectin. I learned how to make jam with the liquid kind and it always turns out so I have stuck with that.

If you use another kind you will need to read the directions to see how much you will need to use.


A super important thing to do is to check the date on the pectin. The only time I had a batch not turn out was when I used some pectin that I didn't know had expired. I had just purchased it and didn't think to check the date.

Since then, I've noticed several expired dates on pectin right in the store.


Now you are ready to start cooking your jam.

Add all the strawberries (4 cups) and all the sugar (7 cups) to a large pan. Stir it well and bring to a rolling boil. A rolling boil is when you can keep stirring and the bubbles don't go away.

It may foam up a bit at this point. In order to do away with that I add 1 Tablespoon of butter. Don't ask me why but it helps.

It will still foam up but, it won't stay that way when you remove it from the heat.

Boil it for 1 minute then add your pouch of pectin. Boil for one more minute. Not longer and not less. One minute!

Then remove from the heat. If you have any foam left at this time, skim it off.

Now get your jars. Keep them hot until just ready to use them. You want everything to be hot. Your jam, your jars and your lids.


Be very careful when you fill up your jars. The mixture is going to be very, very hot! You can use a funnel but, I just use a ladle and spoon it in.

Leave at least 1/8 of an inch at the top. I fill it up to the where the mouth of jar starts.


Then take a wet cloth and wipe off the mouth of the jar. You do not want ANY of the jam on the rim or your lid will not seal. Make sure it's nice and clean.


Get one of your seals out of the water. I use tongs to get them as the water is super hot.


Place it on top of your jar and make sure the rubber part is on the lip of the jar.


Then add the ring part and screw it down tight but not so tight you can't open it up later.


Now, many people will tell you at this point you need to put your filled up jars in a water bath and boil it for so long.

When you make jam you don't have to. The jam has a lot of sugar in it and the temperature gets high enough that you will not get any bacteria.

Plus, if you do my little trick, your lids will seal just fine.

What is the trick? Well, it's simple. Just place your jar of jam upside down for about 15 mins. This will make sure your lid is hot enough to seal.

After about 15 mins just flip it right side up and listen for the popping sound the jars make as they are sealed.

**** IMPORTANT UPDATE

Do NOT follow the above directions.  This is no longer a safe practice.  Please, place jars in a waterbath for 15 mins. after you fill them up.

USDA no longer recommends the above practice as a way to seal jars for safety reasons. 

I love that sound. Sometimes it takes a little longer then you think it will but sooner or later you will hear the pop as long as you did everything right.


Let them cool and sit for at least 24 hour and you will have some of the best tasting jam.


Each batch will make about 8 small jars. I get anywhere from 8 to 9 jars.

These can be stored on your shelf for a year. If for any reason your jam did not seal then you can put the jam into the refrigerator for up to 3 weeks.

You can tell if your jar is sealed because the center of the lid will be sucked down. If after 24 hours you push on the lid and you can push it down then it did not seal.

I hope if you have never made jam before you try it.

It's pretty much the same with all the fruit you use. Just read the directions in your box of pectin for the amounts of fruit, sugar and pectin you will need to use.

Photobucket