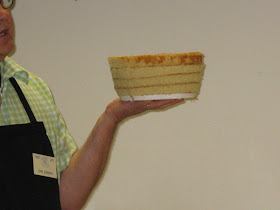
You know those cakes that look like they are falling over. To be honest I'm not a real big fan of them but many people are.
John was doing our demo. I don't know if you get the WE channel, but, if you do, John is one of the decorators on Amazing Wedding Cakes.
He does beautiful work and has been my teacher for years. I love taking classes from him.
 There are a few different ways to put these crooked cakes together. He showed us two different ways.
The one above is pretty and can really be tilted a lot once you know the tricks.
 This is the style I like better. It's not as crooked and I like how the bottom is smaller then the top.
John told us a little secret about baking cakes. He lines the pans with parchment paper only. Then he pours 5/8 of an inch of batter into the pan. No matter what size your pan is always use 5/8 of an inch.
Then bake the cake for about 19-22 mins. The cake will rise up to one inch every time. It will not form a hump that needs to be cut off nor do you have to tort (cut the cake) into layers.
When the cake cools off a little turn the pan over and the cake will come out. Do not take the parchment paper off the cake until later.
 Stack and fill (not done for our demo) four cake layers. The cake will be about 5 inches tall once the filling is added to the cake.
Put a smaller cake board on top of the cakes. Be sure it is centered. Put the cake, with the board on top, on top of the pan you baked the cakes in.

Then take a large, sharp knife and line it up to the top cake board and the bottom of the pan. Then slice the cake off.
It will look like you have a hill or a cone shape when you are finished.

To make the top of the tier slice 1/2 into the cake and then slice a piece of cake at an angle. Be sure not to go the whole way down the one layer of cake as you will cut into your filling. You don't want to do that.

Flip that slice of cake over to the side you didn't cut. You will now have a bigger slant to the layer.
Crumb coat the cake with a thin layer of butter cream incing. Put into the freezer to harden the butter in the icing.
Cover the cake in fondant and smooth it out.
Do the same to your 2nd tier and stack it on top of the bigger tier. Be sure to put a dowel all the way through the cake to help hold in place as you transport it.
Add your flowers and/or other decorations and you now have a lovely cake.

Here he added ribbon along the base of the tiers and then placed a few gumpaste (sugar) flowers he made.
I think this cake is very pretty and elegant. Don't you?

The 2nd way to make one of these cakes is to not do any carving at all.
Just fill your layers, cover with butter cream icing then fondant.
To cover the Styrofoam place lots of flowers or bows in the area between the tiers.
 While this way sounds faster it really isn't because you have to make lots of flowers or bows to cover the Styrofoam.
Well, I hope that gave you an idea of how these cakes are made. If you have questions let me know and I would be happy to answer them for you.


My Birthday is Sept 17th. That's all I have to say.
ReplyDeleteLOL
Ciao
Hmm I like the style that you like better too! LOL. That first cake is cool if you made it all funky and decorated it crazy and not like it was for a wedding. The second one is just neat enough on it's own that it can be done however lol.
ReplyDeleteAll the best,
Allison
Yay! That was really neat! Those cakes are so much fun to look at! :)
ReplyDeleteOh so fun to learn the secrets from the insiders, thecakes are beautiful, I don't know how I could eat it after all that work.
ReplyDeleteThanks for visiting and enjoy your book. Boo!
That is so neat. But, my, what a lot of work. I don't think I could handle it. Now I'm tired just thinking about it. Thanks for sharing though. :) xxoo
ReplyDeleteThat is facsinating. Good tips, but I could still never do it. My cakes look topsy turvy (but not in a good way) when I make regular cakes!
ReplyDeletewhen using the second method- carving the styrofoam instead of the cake- how do you glue the tiers onto the styrofoam? : )
ReplyDeletethank you so, so much!